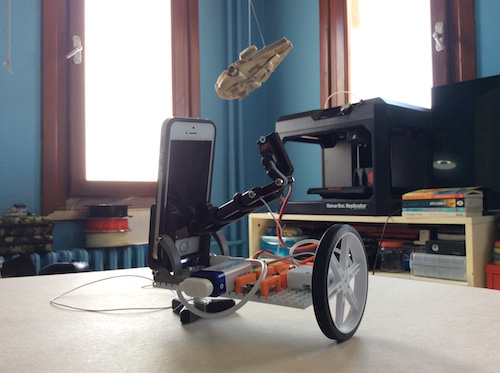
I have been wanting to automize the 123D Catch app for a long time and since I wasn’t working on anything I decided to do that. I was actually going to make an object scanner but for some reason I made a room scanner. I printed the parts on my Makerbot Replicator. It moves around a pivot point and takes pictures using a stylus pen and a servo. I made it with LittleBits so that it would be easier for me to make it, however I will make another one with an actual servo and Arduino etc. I am also planning to make an object scanner using this platform. The parts can be assembled in under 10 minutes and is an easy process. You need 6 M3x20 screws, 6 M3 nuts and 2 M3x10 screws. You will also need the screw that comes from the LittleBits servo. The servo gets attached to d5 in analog and the dc motor gets attached to d9 in pwm. Also for the stylus to work on itself you need to cut about 60 cm of 0.25 mm cable and tuck it to to the back of the pen. After you’ve got the circuit made and the parts assembled, mount them to the LittleBits mounting board. If anything feels loose you can use a bit of blue-tack or double sided tape. Choose you desired angle and place your phone or tablet to the mount. After powering the circuit the servo will start taking pictures. A full 360 turn takes about 50 pictures and is enough for a room scan. After completing the 360 turn power off the circuit and submit the pictures. The app will then process it giving you a 3D scan of your room etc. The code is open source and can be changed for the needs but it works fine as is.
-Code-
// By Tuna Tumer
// www.tna-designs.com
// servo on d5 in ANALOG mode
void setup(){}
int pwmPin = 9 ; // PWM (DAC) output
void loop() {
analogWrite(9,0);
int i;
for (i=100;i<150;i++) { //servo movement
analogWrite(5,i);
delay(10);
}
for (i=100;i<150;i++) {
analogWrite(5,255-i);
delay(10);
}
delay(1000);
analogWrite(9,255); //dc motor
delay(100);
analogWrite(9,0);
delay(1000);
}